We weren’t supposed to be climbing a new route that day. Gabs Clark and I set out to climb “Murder By Numbers”, but on our way, a striking dihedral caught her eye. It was a few pitches up beside a giant streak of red, the full height of the wall, that is visible from the highway far below. We just had to check it out.
“We’ll just scramble a little closer. It’s worth taking a look. Sure, we’re not equipped for exploration, but we can always leave a couple of pins behind and rappel back down.“
Having justified to ourselves why we were pivoting from an established objective into the unknown, we started ‘scrambling’ up toward the ‘start’ of the route. Initially, it was pleasant; we traversed a stream of water running through a red and orange rust streak. Unfortunately, it quickly became evident that we were not, in fact, scrambling; we were soloing the first pitch. I stopped on a narrow ledge and balanced on one foot to put on a single rock shoe, unwilling to commit to the next move without it. A few moves later, a larger ledge allowed me to get my second shoe on.
A lesson I’ll apparently need to keep relearning: Harness up before you start scrambling to the base of the route. We could have easily pivoted to pitched climbing if we’d had gear accessible. Instead, it was the sketchiest part of the day.

We eventually gained a large scree ledge. Our closer vantage gave us a promising view. Gab’s dihedral, which I worried would require bolts, was really a hand/fist crack. And there was a series of corners presenting a plausible path towards it. We racked up, and I ventured onward, leading to the top of a pedestal… and a two-bolt anchor?
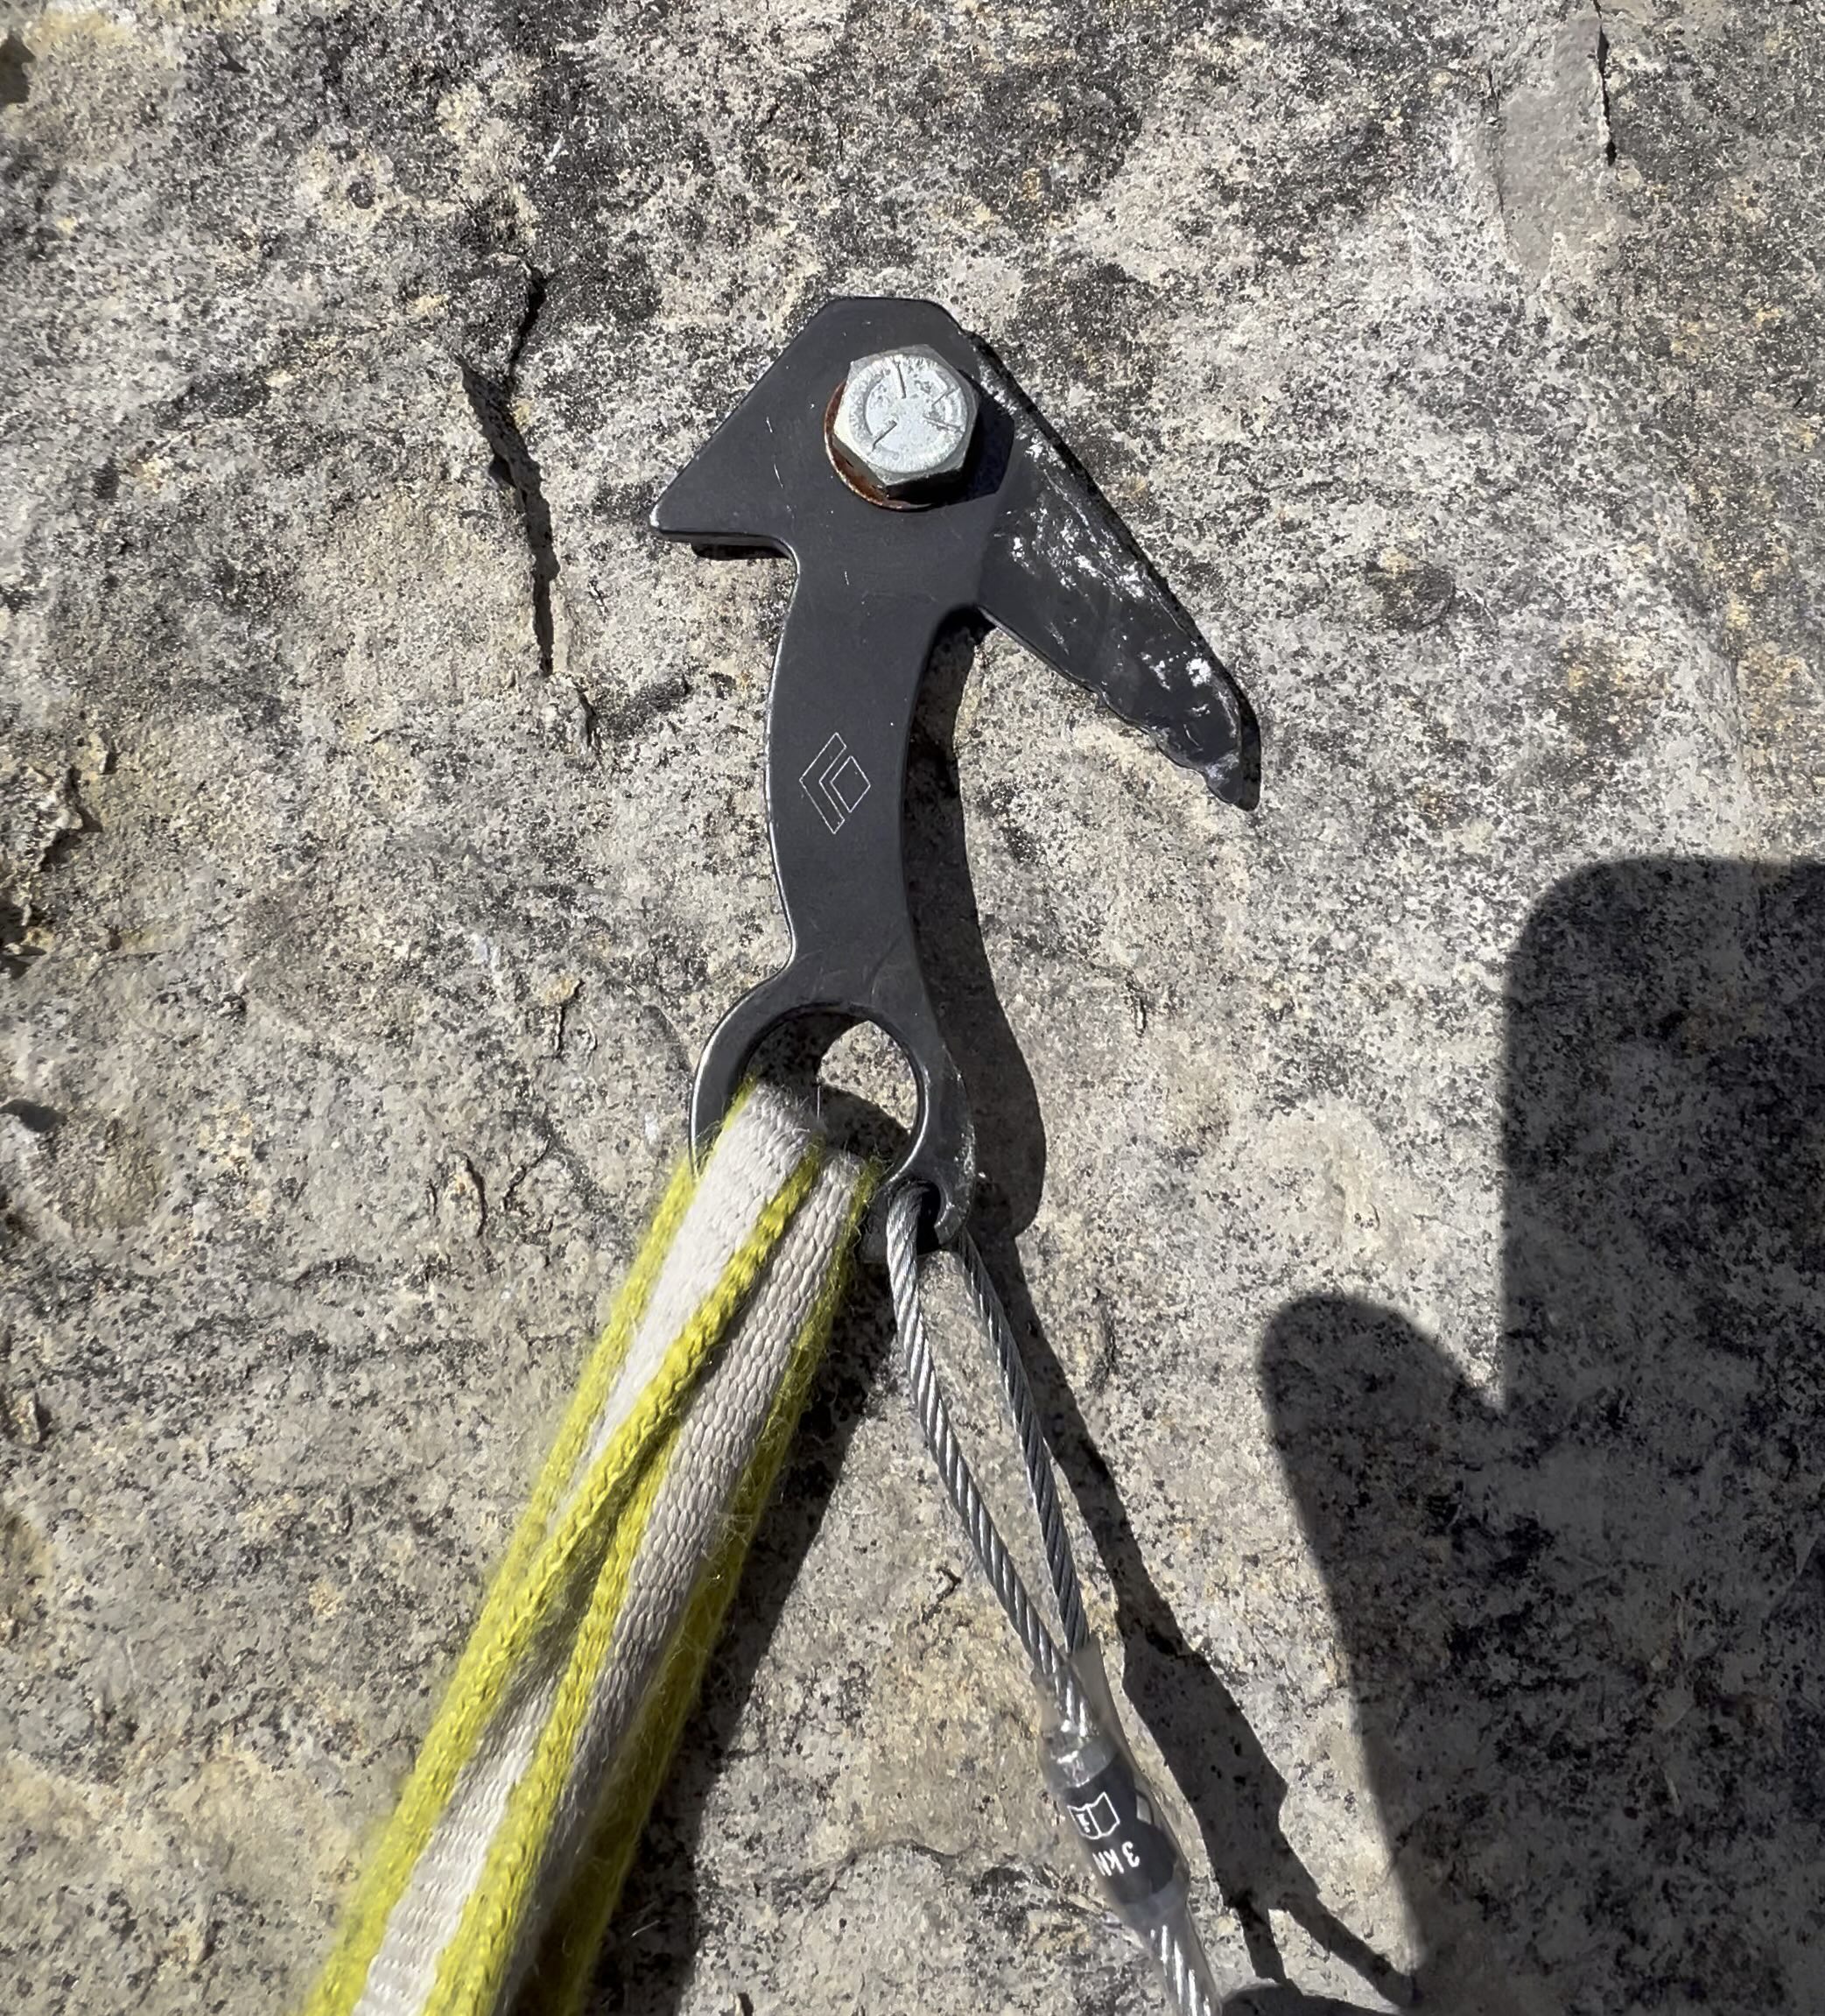
We were not on untrodden ground after all. Two self-drive bolts sat before us, only one of which had a hanger. I was able to unscrew the bolt from the other and bolt a pecker to the wall as an improvised hanger. I felt pretty proud of my innovation, but I was also saddened that we were apparently following in someone else’s footsteps.
Had someone climbed the whole line already? Wouldn’t we have heard about that? I traversed right from the belay, across the stream again, and encountered a bail anchor composed of a self-drive and a nut. Perhaps if there is bail tat, that means the route was never finished?
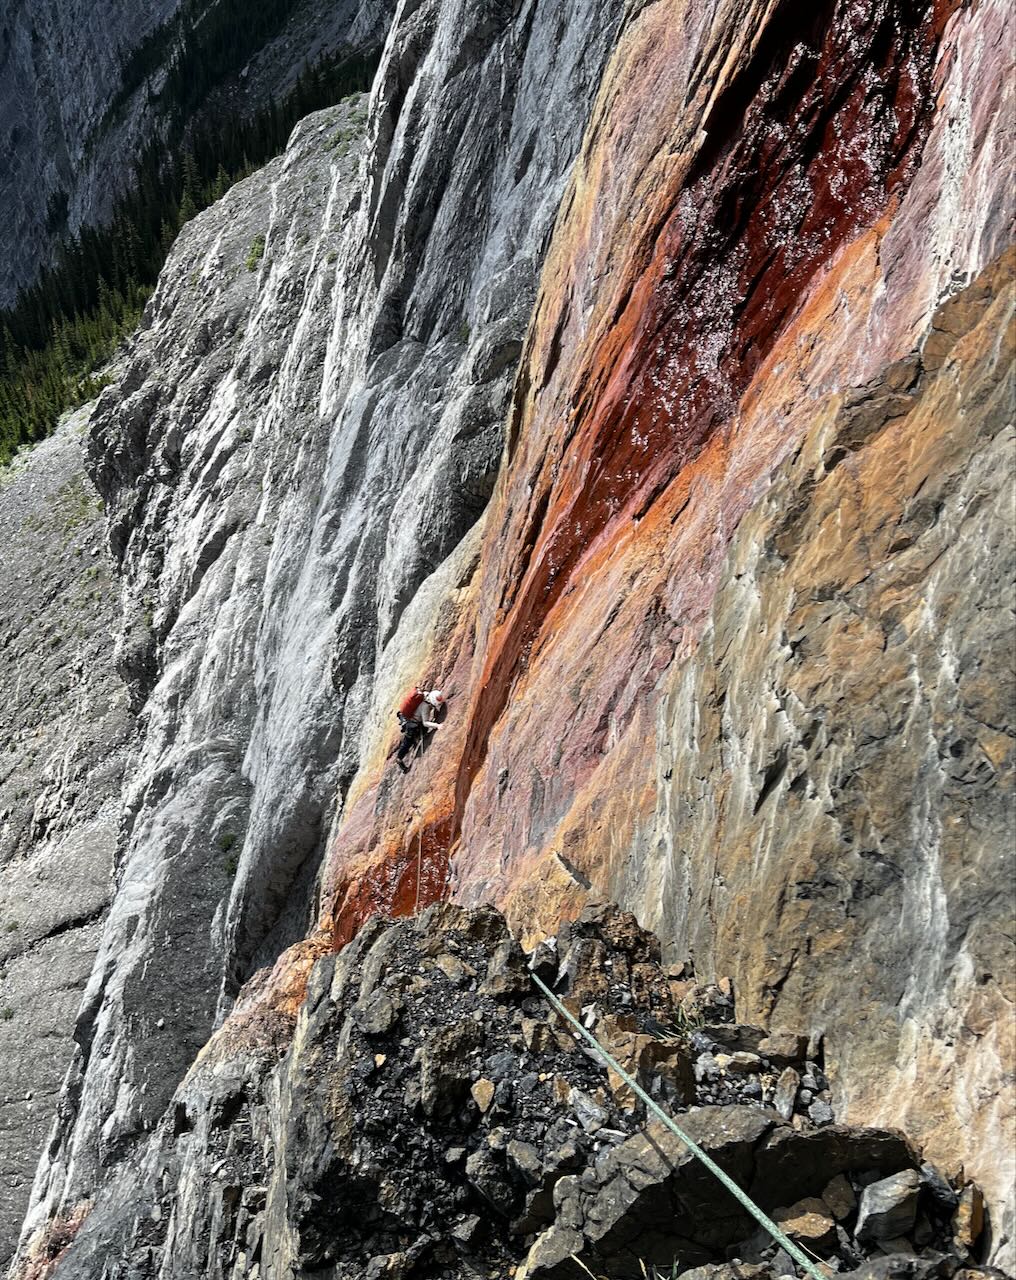
I continued to the base of the dihedral that had initially caught our eyes, and handed the rack over to Gabs. This pitch was her vision, and I couldn’t wait for her to take a crack at it. She picked her way up through bulges, but while the crack was inviting, the walls of the dihedral were remarkably blank. Years of spray from the waterfall created a slippery patina. She worked her way through it, breaking the pitch up when gear ran low. It was a delight to follow, a true treasure of a pitch.
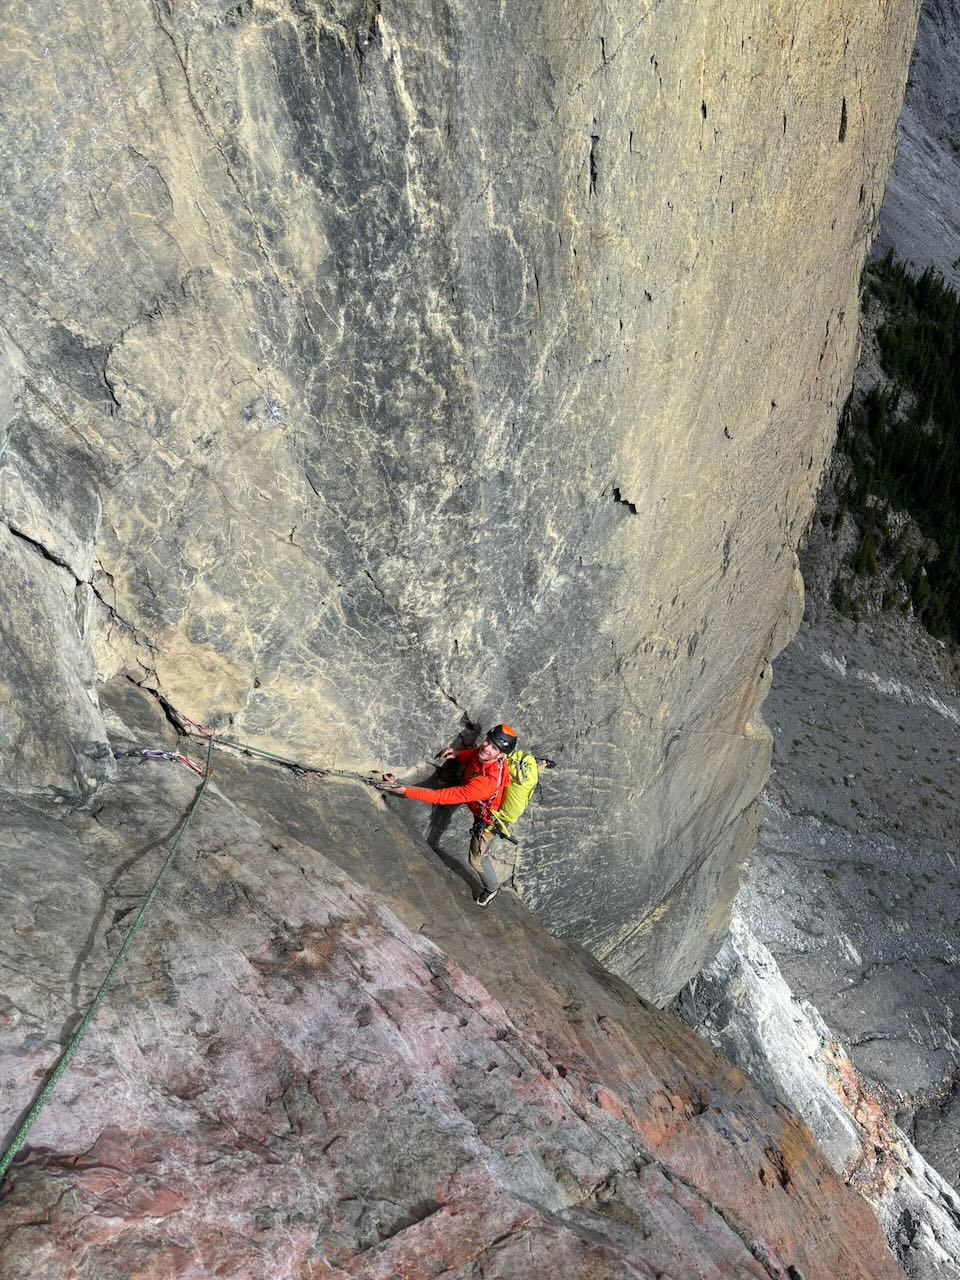
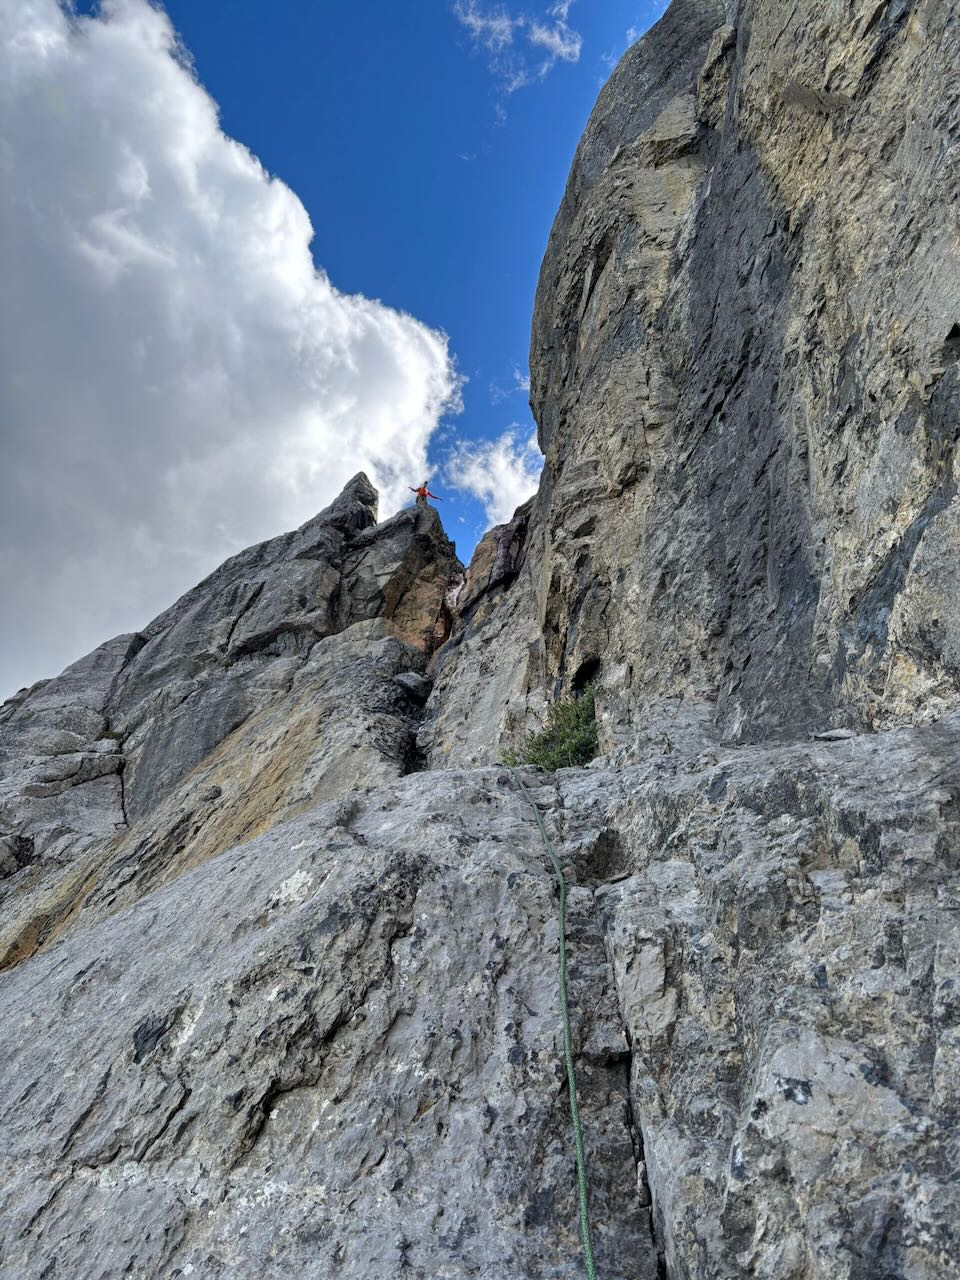
This brought us to a beautiful ledge where the waterfall ran down both the face and a chimney to pool beside our belay. I can’t say I’ve ever found a spot like it partway up a wall. It felt like an oasis. We were surrounded by the reds and oranges of rust on all the walls, the sound of water pouring down into the pool, and the backdrop of the Windtower in the distance. It was a perfect setting for a terrifying lead.
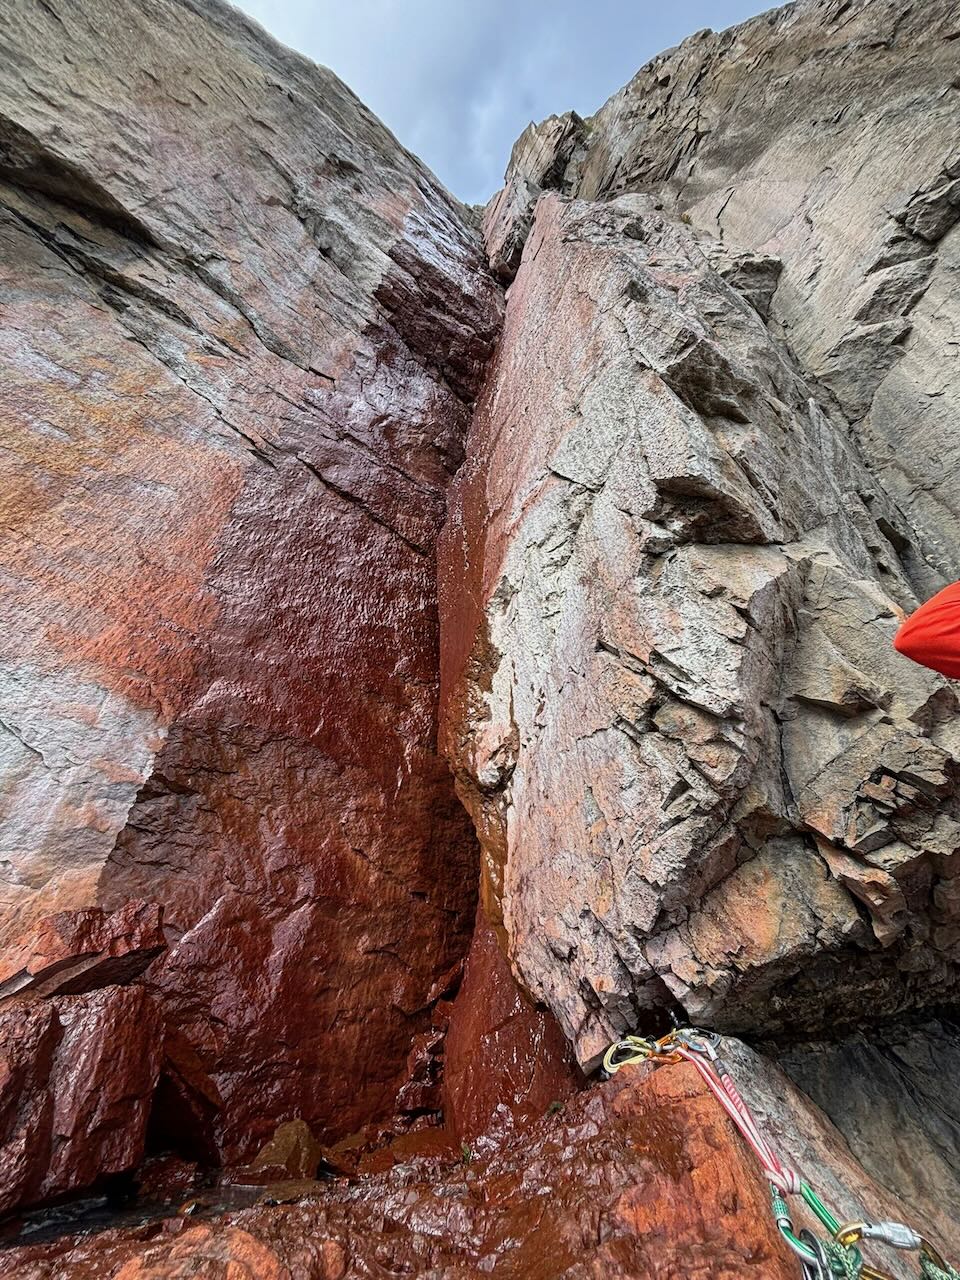
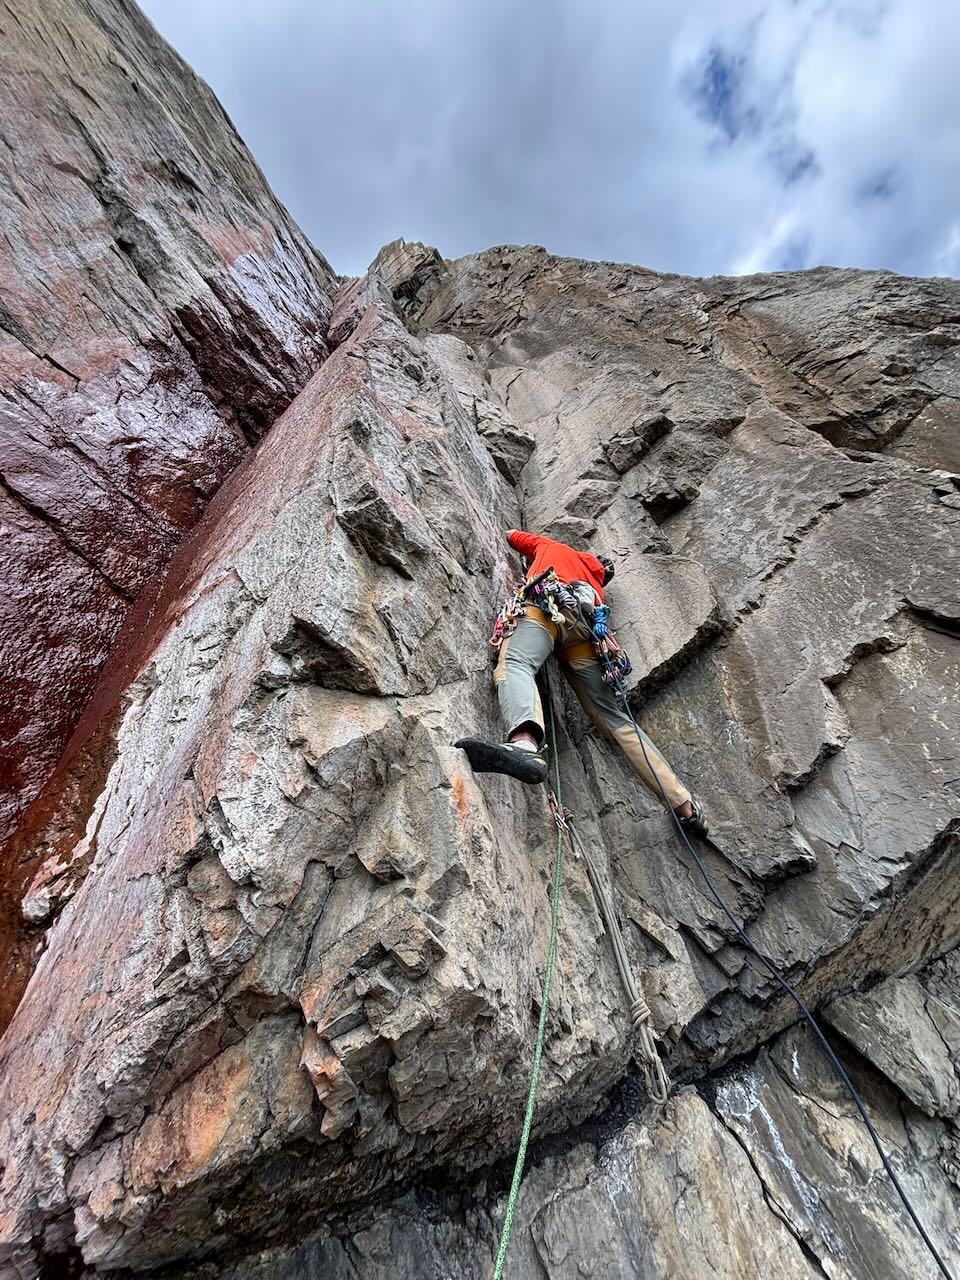
If the waterfall were dry, a lovely chimney would have been available to climb. But, since we didn’t plan on doing an FA, we neglected to bring a snorkel. This forced me into a steep, shallow corner, with very thin cracks. At its base sat the rustiest piton and bolt I’ve ever encountered, more evidence of past efforts. Dismayed by the prospect of hard and poorly protected climbing, I headed off. I’d like to think the sound of the waterfall drowned out my whining and grumbling.
Initially, things weren’t too bad. A finger-sized cam fit into a pod, a knife blade slipped into a crack. I got to a shake before what seemed to be the most challenging climbing, but I couldn’t get any protection besides the smallest nut on my rack. I played with pitons for what felt like 10 minutes, alternately shaking and probing the thin seam. Unwilling to continue without a bit more protection between me and a groundfall, I reluctantly sat on the rope. My tunnel vision opened up slightly, and a better-than-nothing option for another knife blade appeared. It wasn’t great, but it was enough to encourage me to venture on. I regained my stance and launched into a challenging series of reachy face moves. Eventually, the difficulty eased, and the protection improved. The climbing went from thin face to bear-hugging my way up a long pillar.
I like the term “Alpine Red Point”. Did I onsight the crux? No. Did I red point it by a standard definition? Again, no. What I did do is freely climb all of the sequences, only hanging on the rope where I could have shaken almost indefinitely anyway. An Alpine Red Point. Would it be better stylistically to pull the rope and re-lead the first part of the pitch? For sure, but time considerations in the alpine sometimes outweigh stylistic purity for me. I would consider properly red-pointing the pitch to be a bit of a formality. If you want to call that A0, and want to repeat the route and call it an FFA, feel free. To me, there is a pragmatic balance to be found between absolute purity and the realities of alpine climbing.
Ethical digressions aside, we were at another turning point. We were getting into terrain that we hadn’t been able to scope out from the approach. We desperately hoped that the cleft we had seen was, in fact, a climbable, dry-enough chimney. And it was! Delightful steep jamming abounded as we made our way upwards.
The higher we got, the less appealing the prospect of descending became. If we were to descend, we’d have to leave a lot of gear behind. We would have to hope that our ropes didn’t get stuck and that we didn’t send loose rock down on ourselves when we pulled them. With no drill and a fairly light rack for an FA, we felt committed. We didn’t want to go down, but a blank wall or a sopping wet chimney could stop us in our tracks.
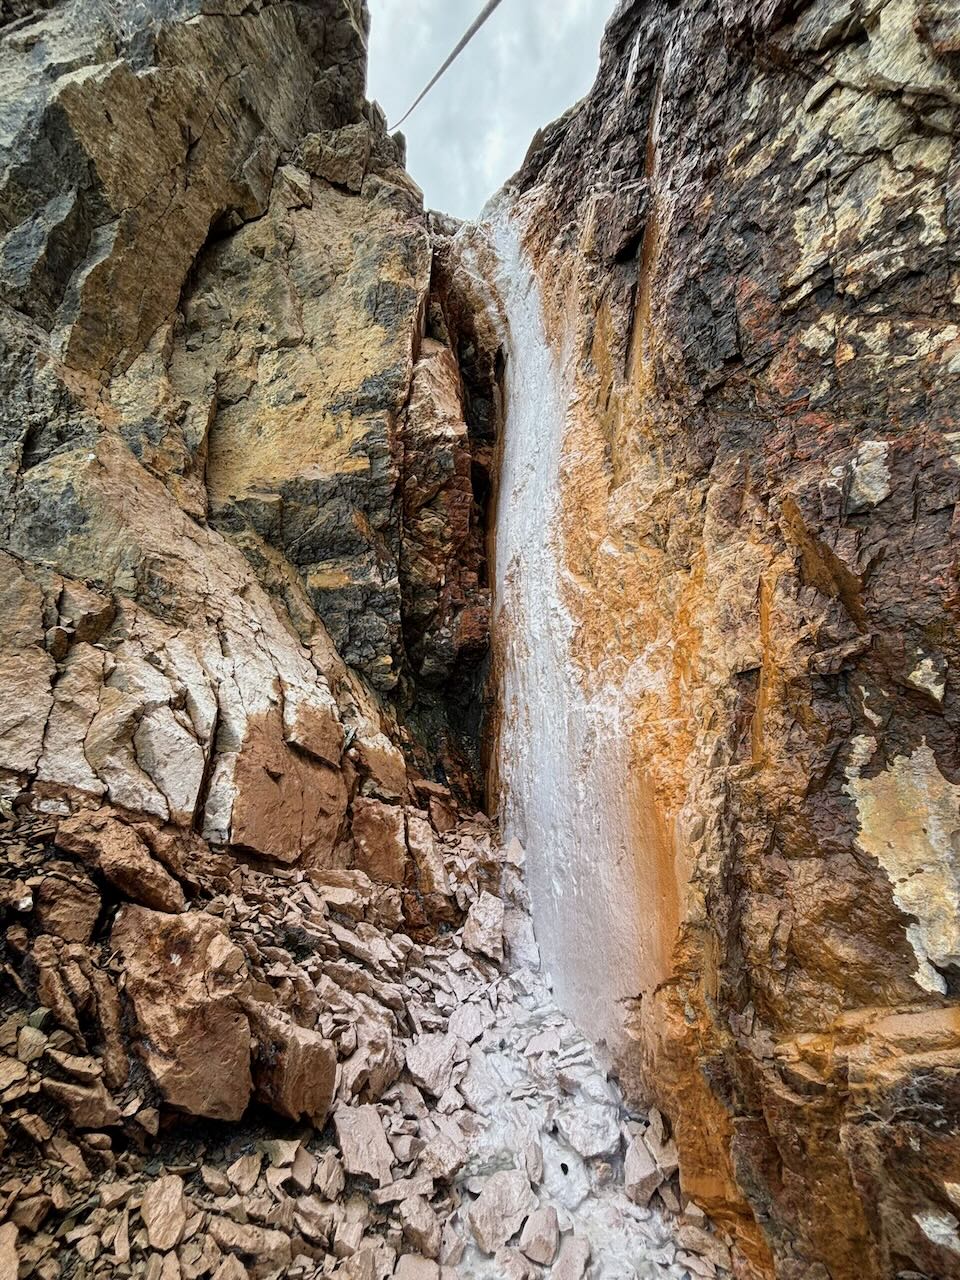
Next, we came to a sopping wet chimney. To my eyes, the water pouring out of it made it look decidedly unappetizing, if it was climbable at all. Gabs felt differently. Looking up at it, she declared that she didn’t care if it was wet; it looked easy enough, and she bet she could even climb it in approach shoes if she had to. She took the rack and splashed her way up without hesitation. Gaining a large ledge above, she said that she could see our path through to the ridge line.
We climbed an oddly technical pillar, we smeared up a slabby dihedral, and we puckered our way up one final poorly protected step. We then found ourselves on a ramp charging back to the source of the waterfall. The exit pitch was only scrambling, but it was geologically wild. From the source, a streak of bright white muck gave way to the wild oranges and reds we had seen below.
Later, a newly minted professional geoscientist gave their literal stamp of approval to the explanation, “I hereby declare rust and white glue”. Or, put more verbosely:
“It’s interesting rock, like a giant chemistry experiment up there. I wonder if it’s slightly more compact because of some pyrite in the rock which would explain the iron staining. Could also maybe explain the calcite precipitate up top as pyrite forms in anoxic conditions with high concentrations of organic matter (kind of close to some of the bigger coal deposits in Canmore?). So the high dissolved CO2 in the water would quickly precipitate as calcite at the top of the flow.”
We scrambled and then sloshed our way out through the muck to gain the ridgeline. We hadn’t seen any sign of travel since the top of the fourth pitch, and we were delighted that our impromptu first ascent had gone so well. We later learned that the fixed gear had been from attempts to climb the flow in the winter. A winter ascent remains a very cool proposition, although likely a pretty challenging one.
Not every route that gets put up is worthy of repeats, nor are they all destined to become classics. However, this one is, and should be. The approach is moderate, the protection is natural, the climbing is excellent, and the waterfall with its calcite and oxides is incredibly unique. Get after it!

Iron Tears
The Rimwall
5.11- 465m TD-
Gabs Clark, Greg Barrett
August 17, 2025
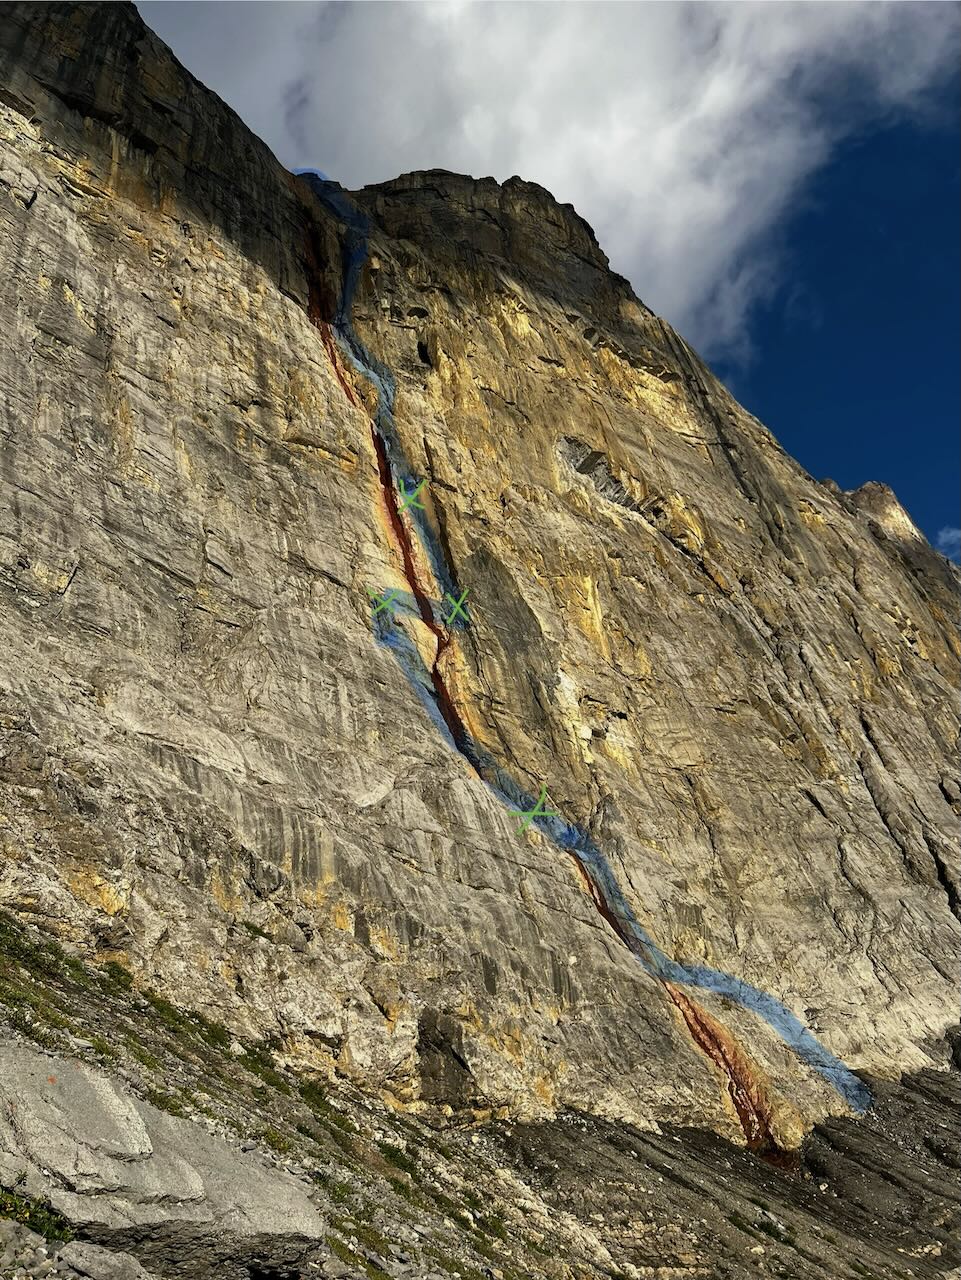
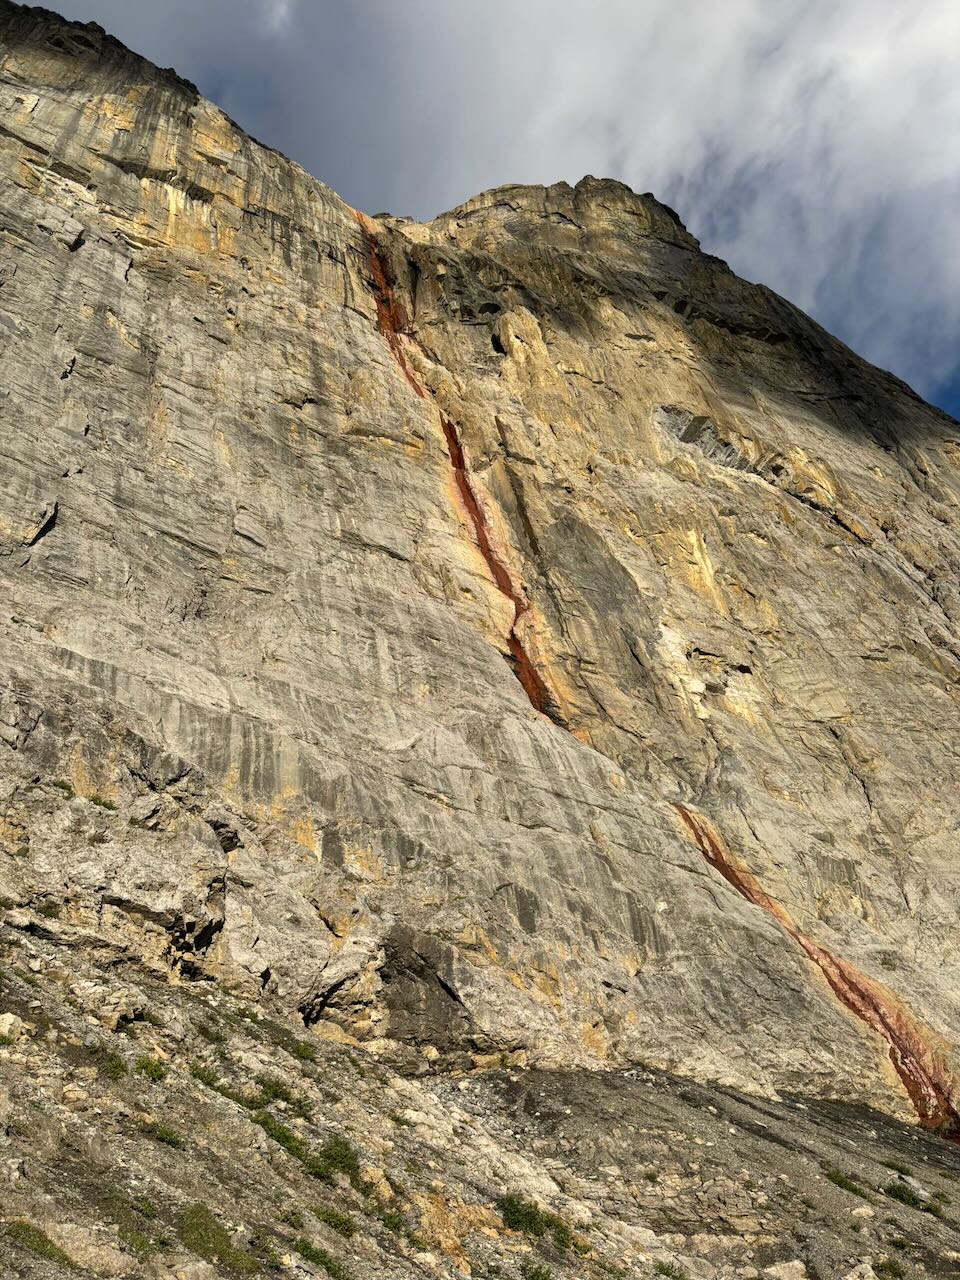
When it rains, the Rimwall cries tears of iron.
The blood colored streak is visible from the highway eight kilometres away, running down its face and into the valley below. Up close, the tears leave behind a gorgeous patina of oranges and reds, smooth water-worn slabs, and deep runnels in the rock. While they’re flowing, there are waterfalls, creeks, and small pools covering the wall. The Rimwall’s iron tears provide a unique ambiance to an alpine climb.
The actual rock is something special, too. It is predominantly dihedral and chimney crack climbing, featuring loads of hand/fist jams and finger locks, and a good share of lie-backing and proper chimney movement. The rock is generally solid, and the climbing is sustained in the 5.8 to 5.10 range.
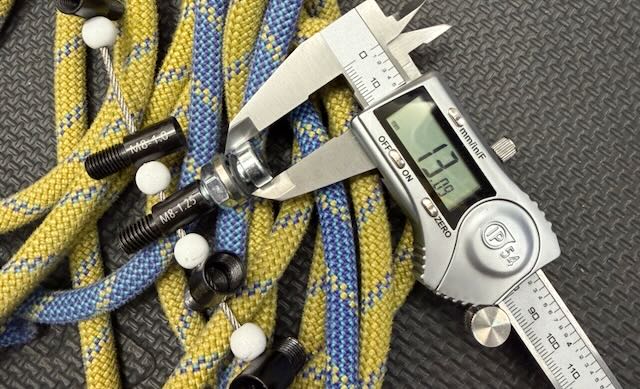
Protection is adequate and traditional, if a bit spicy at times. Two aging bolted anchors could use replacement, and a single lead protection bolt is likely justified. This is detailed in the pitch breakdown.
The route would be easiest when fully dry, but a moderate amount of water flow adds an incredible vibe.
In mid-August, the route received sun until the early afternoon. Being sheltered from the prevailing winds and exposed to quite a bit of sun, it is warmer than you would expect from a NE aspect climb.
The pitch descriptions for the latter half of the route are not perfect. Follow the path of least resistance, trust your instincts, and err on the side of splitting pitches up early.
Approach
Park as for West Wind Pass. Approach to the West Wind Col, then contour around the base of the Rimwall. Stop when you reach the pronounced red streak. 1-1.5 hours.
Iron Tears GPS Track
West Wind Pass (AllTrails)
P1, 5.0, 60m+
The FA party scrambled, starting from the right side of the tears. Climb to a sloping ledge, cross the tears, and gain a right-facing corner. Trend up and left to gain a large scree ledge. Rock shoes and a rope would be advisable.
Alternatively, it seems possible to scramble in from broken ground further the left. This may be less difficult and/or better protected. In either case, you’re targeting a large scree ledge.
P2, 5.8, 50m
Just to the left of the tears, there is a right-facing corner system. Climb this for 20m to gain a smaller scree ledge. Above, a left-facing corner system continues. Climb this to the top of a pinnacle and a two self-drive belay. As of the FA, one was missing a hanger (but had its nut, which can be unscrewed with a wrench). These should be retrofitted.
Alternatively, break this pitch up halfway and combine the second half of it with P3 to avoid belaying on the self-drives.
P3, 5.4, 25m
Traverse rightward across the tears. On the far side, trend up and right, targeting the base of a gorgeous dihedral. A good belay stance can be found by trending further right instead of taking the first corner upward.
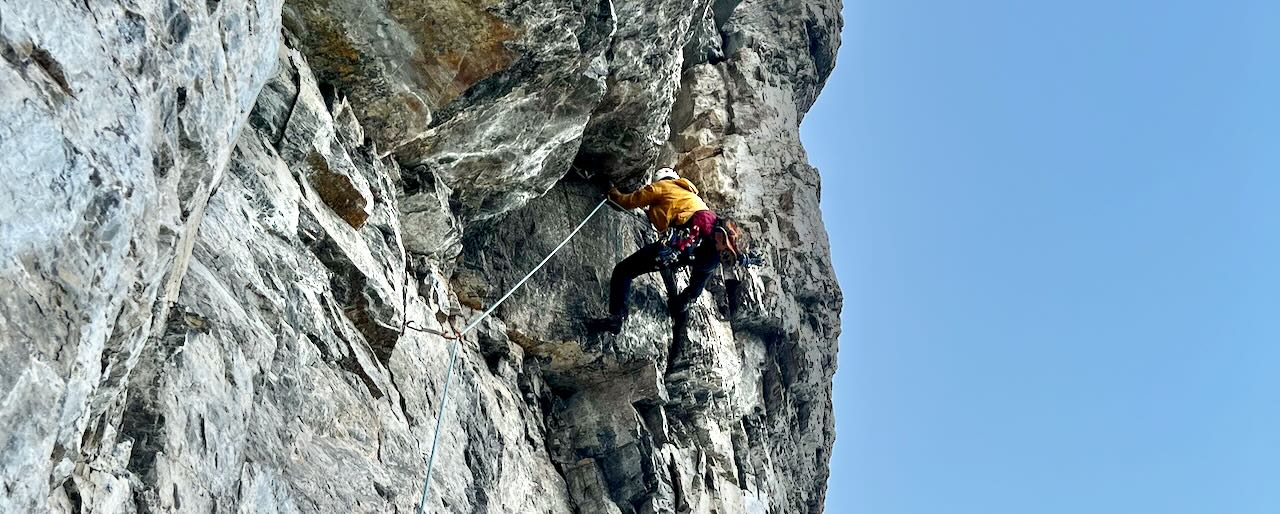
P4, 5.10+, 55m
The money pitch. Climb a beautiful left-facing dihedral on hand jams and finger locks to its top, stepping slightly left below a roof to belay off of two #2s beside a lovely pool. Consider splitting the pitch to keep these two cams available. There is a very rusty fixed belay here, which could be retrofitted with modern bolts.
P5, 5.11-, 30m
The crux pitch. Steep moves off the ground above a manky fixed anchor lead to technical sequences. The crux moves can be protected by a tiny nut, which can be backed up with a large KB or small LA. It might be prudent to add a protection bolt here. Above, the difficulties ease somewhat and become engaging pillar climbing.
Alternatively, if the tears aren’t flowing, you may be able to climb a chimney above the pool, regaining the original line above the crux moves. For the FA this option was a waterfall.
P6, 5.9, 30m
Continue up a chimney for 30m before stepping right to a belay. It may be possible to link this with the previous pitch.
P7, 5.10-, 60m
Climb the obvious chimney feature, potentially making it to a large ledge after a full rope length. It may be best to break this up halfway.
P8, 5.9, 40m
Continue up more chimney features until you reach a wonderful belay ledge. A 10m section of this pitch had running water for the FA, but was still climbable.
P9, 5.10-, 25m
Climb the lovely corner above to a crux at its top, gaining a large ledge. Head right across this ledge to the base of another left-facing corner. Belay here.
P10, 5.10-, 50m
Climb the left-facing corner. It’s harder and more technical than it looks. When you reach a ledge, trend left up a right-facing corner to gain a ramp system back towards the tears. Belay a ways up the ramp, but before it turns into unprotectable scree.
P11, 5.0, 40m
Continue up the ramp back toward the source of the tears. Ascend ledges on the right side of the tears, before eventually stepping back into the tears themselves to gain the scree bowl. Do a Yamnuska-style seated scree belay, or continue up to a rock outcropping. There is little to no good protection on this “pitch”, but the movement is moderate and secure enough, if a bit chossy.
Descent
Tag the summit if you wish, and descend via the scrambling route.
Rack
Single rack .2-3, doubles .3-2. A full set of nuts. A #4 would be useful, as would triple .5 & .75.
A large KB or small LA could help protect the crux, but otherwise, hammers can be left at home.
60m ropes, a single/tag configuration is useful for hauling packs on hard / chimney pitches.
There is loads of sharp jamming, consider crack gloves.